 tetoblog
本記事の内容
UIStepperとは
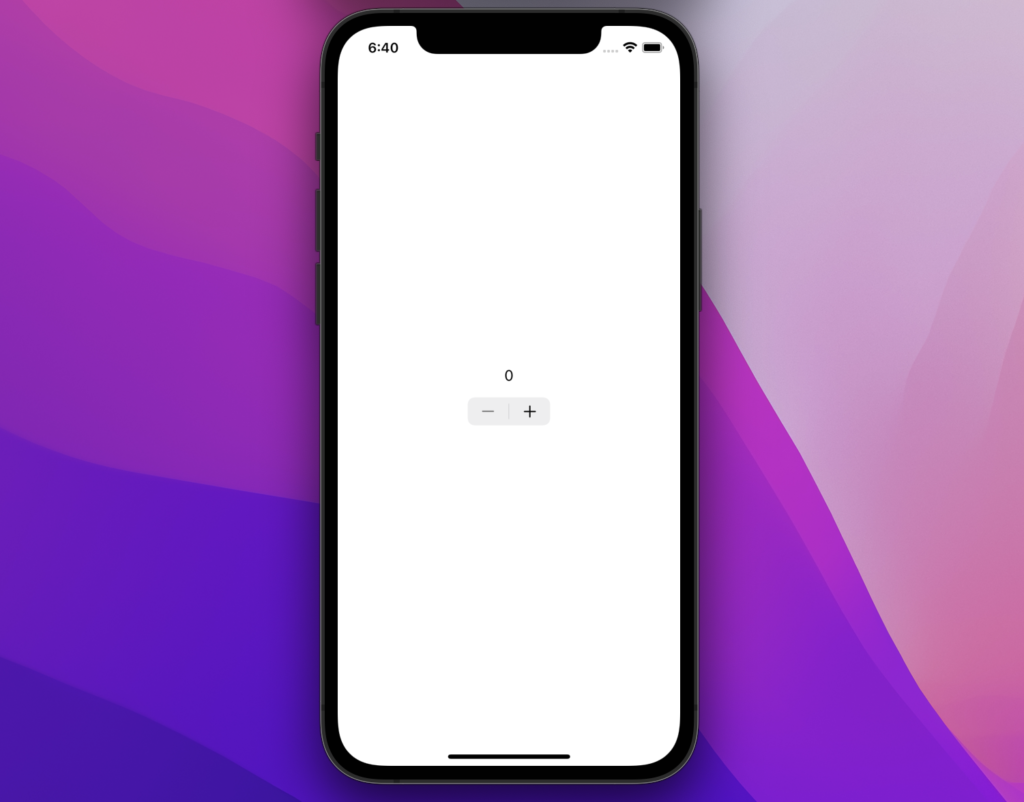
「ー」と「+」が表示されているものをUISTpperといいます。
初期値やカウントの間隔を変えれることはもちろん、長押しでカウントを進めるかどうか等も操作することができます。
ソースコード
上記の画像のとおりに動作するコードは下記の通りです。
「value」を使って簡単に値を取り出せるので、自分でメソッド作るよりもめちゃめちゃ簡単ですね。
import UIKit

class ViewController: UIViewController {

    @IBOutlet weak var numLavel: UILabel!

    @IBAction func didTapStepper(_ sender: UIStepper) {
        let num = Int(sender.value)
        numLavel.text = String(num)
    }
}
自分のPCで動かしたい方は、下記のGitHubリンクから是非是非クローンして下さい。
https://github.com/MaedaKouta/MiniApp24-UIStepper
補足
もっと詳しく知りたい方は、公式リファレンスをどうぞ。
https://developer.apple.com/documentation/swiftui/stepper
「stepValue」でカウント間隔を変更できたり、「autorepeat」で長押し操作できたり色々できるっぽいです。Definnition載せておきます!
@available(iOS 5.0, *)
open class UIStepper : UIControl {


    open var isContinuous: Bool // if YES, value change events are sent any time the value changes during interaction. default = YES

    open var autorepeat: Bool // if YES, press & hold repeatedly alters value. default = YES

    open var wraps: Bool // if YES, value wraps from min <-> max. default = NO


    open var value: Double // default is 0. sends UIControlEventValueChanged. clamped to min/max

    open var minimumValue: Double // default 0. must be less than maximumValue

    open var maximumValue: Double // default 100. must be greater than minimumValue

    open var stepValue: Double // default 1. must be greater than 0


    // a background image which will be 3-way stretched over the whole of the control. Each half of the stepper will paint the image appropriate for its state
    @available(iOS 6.0, *)
    open func setBackgroundImage(_ image: UIImage?, for state: UIControl.State)

    @available(iOS 6.0, *)
    open func backgroundImage(for state: UIControl.State) -> UIImage?


    // an image which will be painted in between the two stepper segments. The image is selected depending both segments' state
    @available(iOS 6.0, *)
    open func setDividerImage(_ image: UIImage?, forLeftSegmentState leftState: UIControl.State, rightSegmentState rightState: UIControl.State)

    @available(iOS 6.0, *)
    open func dividerImage(forLeftSegmentState state: UIControl.State, rightSegmentState state: UIControl.State) -> UIImage?


    // the glyph image for the plus/increase button
    @available(iOS 6.0, *)
    open func setIncrementImage(_ image: UIImage?, for state: UIControl.State)

    @available(iOS 6.0, *)
    open func incrementImage(for state: UIControl.State) -> UIImage?


    // the glyph image for the minus/decrease button
    @available(iOS 6.0, *)
    open func setDecrementImage(_ image: UIImage?, for state: UIControl.State)

    @available(iOS 6.0, *)
    open func decrementImage(for state: UIControl.State) -> UIImage?
}
ということで、本記事はXcodeでUIStepperを使う方法を自分のメモ程度にまとめました。
本記事を書いている僕自身は、まだSwift初学者のためコードに至らない点が多いと思います。参考程度にご活用下さい。
アドバイスやコードの改善などあれば本記事の最後の部分からコメントしてくださいね。
最後まで読んでいただきありがとうございました!
おすすめSwift書籍
Swiftを学ぶなら、間違いのない2冊はこちら
リンク
リンク
Xcodeを学ぶなら下の一冊
リンク